Easy Instructions on How to Clean Your Dog's Ears.
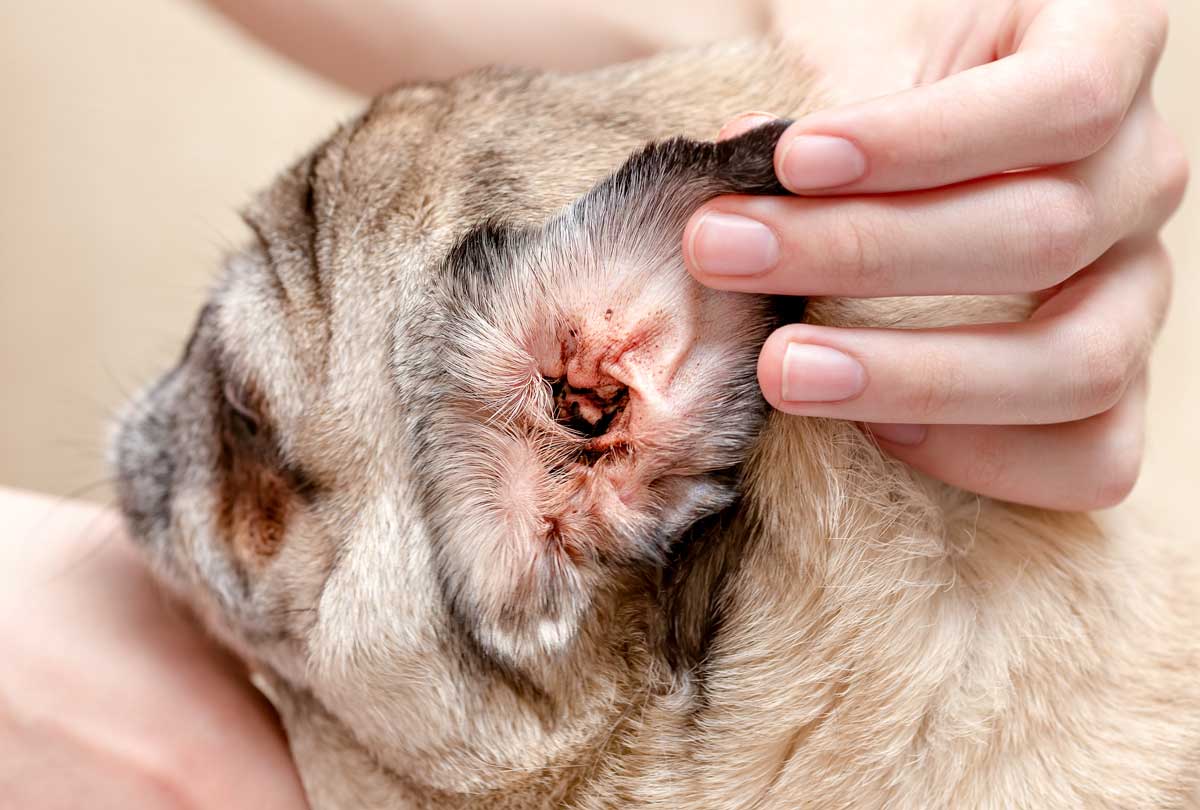
There are two types of dog parents in this world: those who find it oddly satisfying cleaning their dog’s ears – you know, seeing all that wax come out onto the cotton ball – and those who are (eww!) grossed out by it.
No matter which category you fall into, knowing how to clean your dog’s ears is essential for keeping them healthy, happy, and free of a dog ear infection. And with a little practice and patience, dog ear cleaning can soon be a walk in the park!
How Often Do You Clean a Dog’s Ears?
It depends on the dog. Certain dog breeds are more likely to get dirty ears and wax buildup than others, especially if they have floppy ears, love to play in the water, or have seasonal or food allergies.

Basset Hounds, Chinese Shar-Peis, Labradoodles, Spaniels, Golden Retrievers and Beagles all make the list of "Most Likely to Get an Ear Infection." These breeds generally require more frequent ear cleanings, usually once a week or once a month. Older pets are also prone to dirty ears and infection because their ear skin is thicker.
Your dog’s veterinarian is a great resource on how often to clean your dog’s ears. You can also easily determine if it’s time for a cleaning by looking at and smelling your pet’s ears. If they’re clean and free of odor, just leave them alone, as over-cleaning can cause irritation.
What to Clean Your Dog’s Ears With
Fortunately, you only need a few things to tackle the task of dog ear cleaning: a cotton ball (or gauze), a towel, treats, and a veterinarian-approved Dog Ear Cleaner. Be sure to avoid ear cleaners with alcohol and fragrances, as they can sting and irritate ear tissue.

Important: never sub out cotton balls for Q-tips. They will compact wax and debris further into the ear and can even damage your dog’s ear canal.
How to Clean a Dog’s Ears With Hydrogen Peroxide
Wait, don’t do it!
We’ve all had our share of hilarious Pinterest fails, whether it's cupcakes that come out looking like indistinguishable blobs or art projects destined for the dumpster. But that doesn’t stop us from trying!
However, when it comes to cleaning a dog’s ears at home, that’s when it’s time to put aside our DIY dreams. Common household ingredients like hydrogen peroxide, vinegar, and rubbing alcohol can be too harsh on dogs' ears.
Hydrogen peroxide will also cause bubbling sounds within the dog’s ear as it breaks up wax. This is scary for dogs and will not bode well for future ear cleanings!
Easy Instructions for Cleaning Your Dog’s Ears
-
 Gather your supplies: A gentle Pet Ear Cleaner, cotton balls, a towel, a treat. Sweet – you’re all ready to go. And if you don’t have a cotton ball, don’t sweat it. You can also use an old cloth or T-shirt, makeup remover pads, or gauze. Just no Q-tips!
 -
Choose a location: Dog ear cleaning can be messy, and you definitely don’t want to do it near your light-colored couches! Bathrooms work great because they’re easy to wipe down, but any other room that’s easy to clean works too. You can also do this outside if the weather is nice.

-
Get in position: This can be the most awkward part of ear cleaning when you’re first starting out. And it may take a few sessions before you find what works best for you and your dog.

Depending on the size of your dog, you can either sit on the floor or in a chair, with your dog sitting or standing in front of you, their backside between your legs.
For large breeds, you can also position them in the corner of a room (ideally in a "sit" position), one side of them against the wall, with you standing on their other side, so they don't try to escape.
-
Apply the ear cleaner in one ear: Hold your dog’s ear flap with one hand while using the other to completely fill their ear canal with cleaner. Careful not to put the tip of the bottle into your dog’s ear. (If you do this by accident, just clean the tip off with alcohol to prevent any bacteria spread.)

Note: if you try this a few times and it’s NOT working out, don’t worry! Just skip to the next section for pets who hate ear cleaning.
-
Massage the ear: Place one finger in front of and at the base of the dog’s ear flap, then place your thumb behind and at the base. Massage your pet’s ear in this position for 30 seconds to give the ear wash adequate time to loosen up stubborn debris. (A squishing sound is totally normal to hear, btw.)

-
Let your dog shake, shake, shake: This is where that towel will come in handy. You’ll want to protect yourself from the spray, and wipe your dog’s face when they're done shaking.

-
Wipe away debris: Use a cotton ball or gauze to remove debris from the inside flap and upper canal of your dog’s ear. Never insert your finger into the ear canal farther than a knuckle. Repeat until cotton balls come out clean and ear is dry.

-
Treat and repeat with other ear: Give your pet a treat after ear cleaning (no matter how it went) to build a positive association with it.

How to Clean Dog’s Ears When They Hate It
If your dog just can’t stand having ear cleaner poured into the ears and runs when he sees you with the bottle, it’s time for plan B. In this case, there’s no ear cleaner going directly into the ear at all. Your dog will only be around cotton balls!
How to clean dog’s ears with a cotton ball:
- Saturate a cotton ball with ear cleaner. Do this out of your pet’s view, so they don’t see the bottle and bolt!
- Hold ear flap gently and place soaked cotton ball at opening of ear canal. Do not push into ear canal.
- Gently massage ear for 20 seconds.
- Remove cotton ball and let pet shake.
- Repeat steps until cotton ball comes out clean.
- Use a dry cotton ball to wipe out any remaining moisture.
- Move on to the other ear. And don't forget to treat!
When to Involve Your Vet ...
If you suspect your dog has an ear infection, don’t wait it out. A trip to the vet is necessary. The good news is that keeping your dog’s ears clean is one of the best ways to avoid an ear infection in the first place.

The Right Ear Cleaner Can Make All the Difference
As you've read, Pinterest fails are best left for cupcakes ... not your pup's ear cleaning solution, as popular DIY ingredients like hydrogen peroxide, vinegar, and rubbing alcohol can sting delicate ear tissue and/or bubble inside the ear, scaring your pet.
But buyer beware! A lot of store-brand ear cleaners are equally harsh. You'll want to be a label-reading guru and steer clear of alcohol-based ingredients and fragrances, as they can irritate pet ears, ironically, increasing the chance of an ear infection.
If you want to save yourself some time (there's cuddling to do, after all), go with the choice that groomers and veterinarians trust: Oxyfresh Pet Ear Cleaner.
When we say it's a gentle formula, we mean it! You won't find alcohol, fragrances, dyes, oils or anything else that can irritate your pet's sensitive ears or leave pesky residue behind. Formulated with gentle plant-based surfactants, it easily cleans out even the most stubborn ear wax, helping to stop annoying itching and head shaking in its tracks.
Plus, only Oxyfresh has the non-toxic odor-eliminating power of Oxygene® to get rid of stinky, yeasty-smelling ear odors on contact.
Whether you're new to the world of pet ear cleaning, or you're ready to give it a second chance, Oxyfresh Pet Ear Cleaner is, paws down, your best partner for success.
Let’s Get (Ear) Cleaning!
Now that you know how to clean your dog’s ears, and the best product to do it with, it’s time to try it out! Don’t worry if it doesn’t go as planned the first time. Just stick with it and figure out what works best for you and your pup. You can do it, and those healthy ears are so worth it!

